Managing Zenarmor Policies on OPNsense
Advanced policy-based filtering is one of the most-loved features of Zenarmor. Based on your organization's information security standards, a Zenarmor policy defines how your organization's firewalls should process inbound and outbound network traffic for certain IP addresses, address ranges, users, user groups, protocols, applications, content categories, and more.
You can easily configure your Zenarmor policies on your OPNsense web UI by completing the tasks explained in this guide.
To manage Zenarmor policies on your OPNsense firewall, navigate to the Zenarmor → Policies on OPNsense web UI.
Policy Management
With Filtering Policies, you can perform the following tasks:
-
View the list of the policies
-
View the status of the policies
-
View the status and profiles of the Security, Application & Web Controls
-
Enable/Disable a policy
-
Edit/Delete/Clone a policy
-
Reorder the policies
Viewing Policies List & Status of the Policies
All of the defined policies on your firewall are listed on the Policies page as well as the status of the policies.

Figure 1. Policy List View
Status
 If the policy is enabled, a solid green circle is displayed in the bottom right corner of the policy's icon to the left of the policy name.
![]() If the policy is not enabled, you will see a solid white circle instead of green.
If the policy is not enabled, you will see a solid white circle instead of green.
Policy Actions
In the Policy List View, where all your policies are listed, you can carry out the following management tasks:
- Enabling or Disabling
- Editing
- Deleting
- Cloning
- Ordering
Enabling/Disabling Policy
You can easily change the status of the Policy to Enabled or Disabled by clicking on the Status toggle button on the Policy Configuration page or by clicking on the toggle button next to the policy name on Policy list view.

Figure 2. Policy Status
Editing a Policy
You may edit a policy by simply clicking on the name of the policy in the policy list view. For more information about policy configuration, please refer to Configuring a policy.

Figure 3. Editing Policy
Creating a New Policy
To create a new policy you may follow the next steps:
-
Click on the Create New Policy button at the top right corner of the Policies page. A dialog box will open for renaming the new policy.
-
Enter a name and click the Create button. The new policy will be created automatically. You will see the new policy in the policy list view. It will be disabled by default. You need to configure it in order to enable it. For more information about policy configuration, please refer to Configuring a policy.

Figure 4. Creating a new policy
Here is a video that will guide you through creating additional policies on Zenarmor Premium Editions:
Deleting Policy
To delete a policy you may follow the next steps:
-
Click on the trash icon
 next to the policy that will be removed on the Policies page. This will open a dialog box for confirming the deletion of the policy.

Figure 5. Deleting a policy
-
Click the Remove button to confirm the policy removal. The policy will be removed from the firewall.

Figure 6. Confirming Policy Removal
Cloning a Policy
Zenarmor allows you to clone a policy. This will create a new policy with the same settings as the original policy.
To make a copy of a policy you may follow the next steps:
-
Navigate to the Zenarmor → Policies on your OPNsense web UI.
-
Click on the clone icon
 next to the policy name that you wish to copy. This will open a dialog box for renaming the clone of the policy.
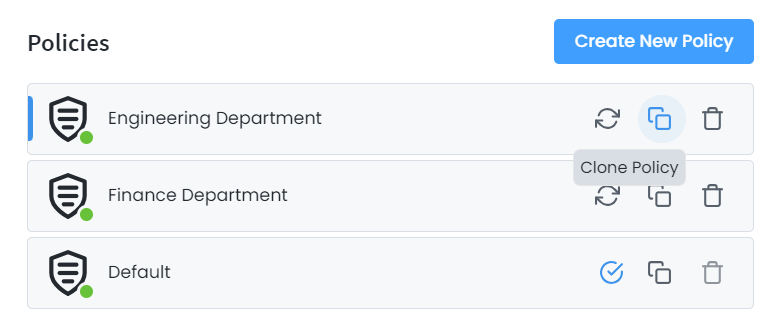
Figure 7. Cloning a Policy
-
Enter a descriptive name for the new policy.

Figure 8. Renaming Cloned Policy
-
Click the Clone button. The new policy will be disabled by default. You will see the clone of the policy in the policy list view. You need to configure the newly cloned policy to enable it.
Policy Clone feature is available only for Paid Edition. If you need more than one policy, you must have a Premium subscription. For more information, please refer to plans & pricing.
Ordering Policies
The order of policies is important for applying rules. The policy which is displayed at the top of the list is evaluated and applied first if matched. The default policy is the fall-back policy which gets applied if no other policies are matching. The default policy’s configuration can not be edited, or deleted. It cannot be moved up or down. You can still customize the Security / App / Web Control rules for the Default Policy.
A policy may be easily reordered by dragging and dropping it inside the policy list.
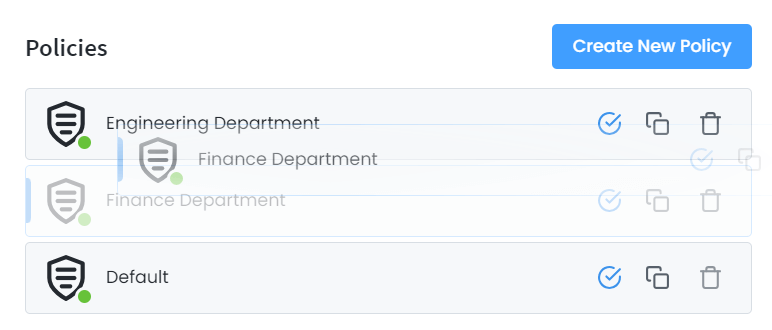
Figure 9. Reordering Policies
In the Free Edition, since there’s a single Default Policy, you should customize your rules under the Default Policy.