Installing Zenarmor® NGFW plugin on OPNsense Web UI
OPNsense is a great open-source firewall. Maintaining a regular updates policy, being very reliable, and providing quite many features (VPN, Intrusion Prevention System, Open Source Threat Intelligence, etc), it's a super viable alternative to commercial firewalls out there.
Complementing this legacy, Sunny Valley Cybersecurity Inc. has created Zenarmor®, to add Next-Generation Firewall features to the firewall.
The installation of Zenarmor is straightforward and speedy. The OPNsense web UI can be used to install Zenarmor.
Since Hardware Offloading feature is incompatible with netmap, make sure that the following hardware offloading options are disabled on your OPNsense node by navigating to Interfaces → Settings:
-
Hardware Checksum Offloading (Both IPv4 and IPv6)
-
Hardware TCP Segmentation Offload (TSO)
-
Hardware Large Receive Offload (LRO)
-
Hardware VLAN Tagging & Filtering
We advise you to read the Best Practices for Zenarmor Deployment Guide after installing Zenarmor plugin on your firewall.
For The Impatient
Experienced OPNsense firewall administrators or impatient may quickly start to use next-generation firewall features by following the steps given below.
- Install the
os-sunnyvalleyVendor Repository plugin. - Install the
os-senseiZenarmor Next Generation Firewall plugin.
For Meticulous Administrators or Newcomers
Detailed Zenarmor installation is given below for meticulous administrators or newcomers.
Vendor Repository plugin installation
To install the Vendor Repository plugin, follow the steps below:
-
Login to your OPNsense Web GUI using an account with administrative access such as
root. -
Navigate to
System→Firmware→Plugins. -
Type
os-sunnyvalleyin the search field to find the Vendor Repository for Zenarmor Next Generation Firewall Extensions.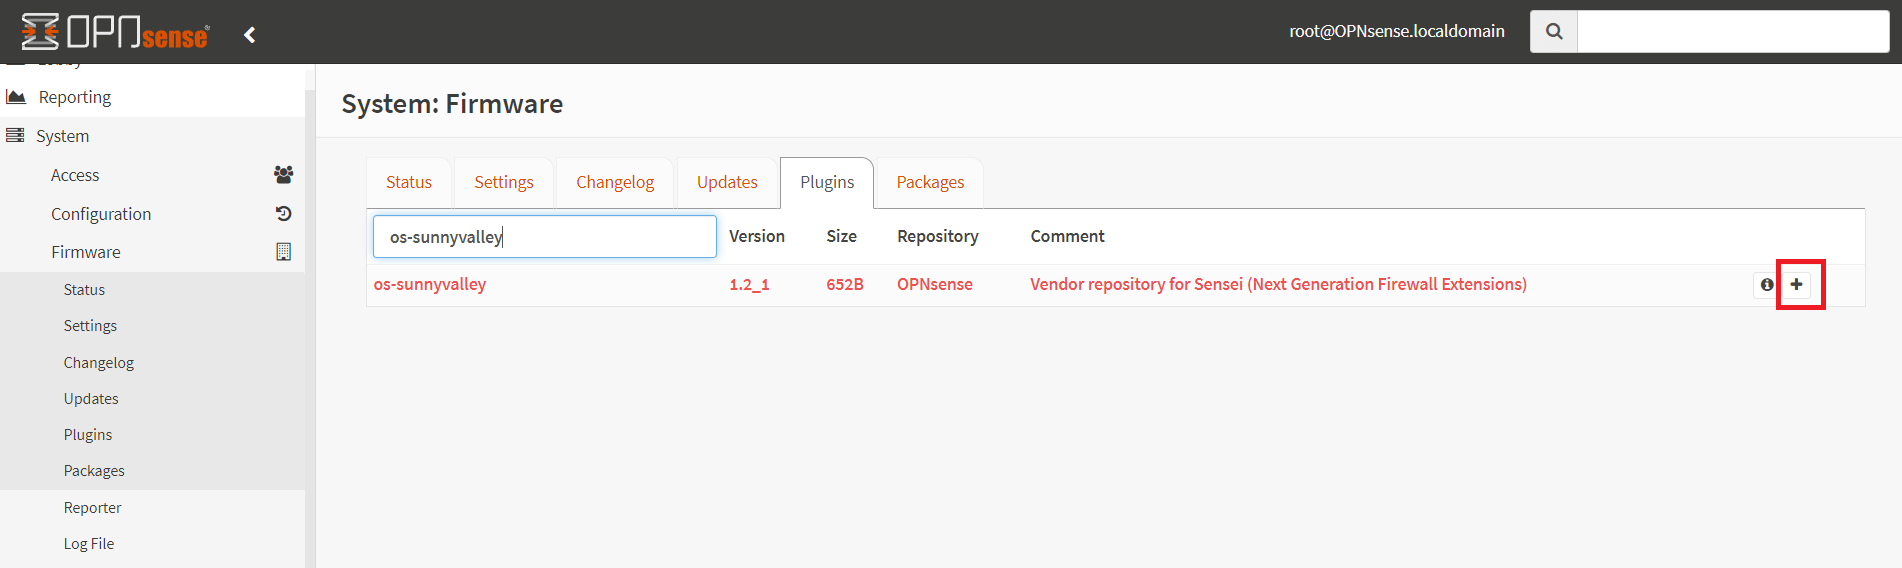
Figure 1: Installing Vendor Repository for Zenarmor Next Generation Firewall Extensions
-
Click on the
+icon next toos-sunnyvalleyto install the Vendor Repository plugin. Then you will be redirected to the Update menu tab.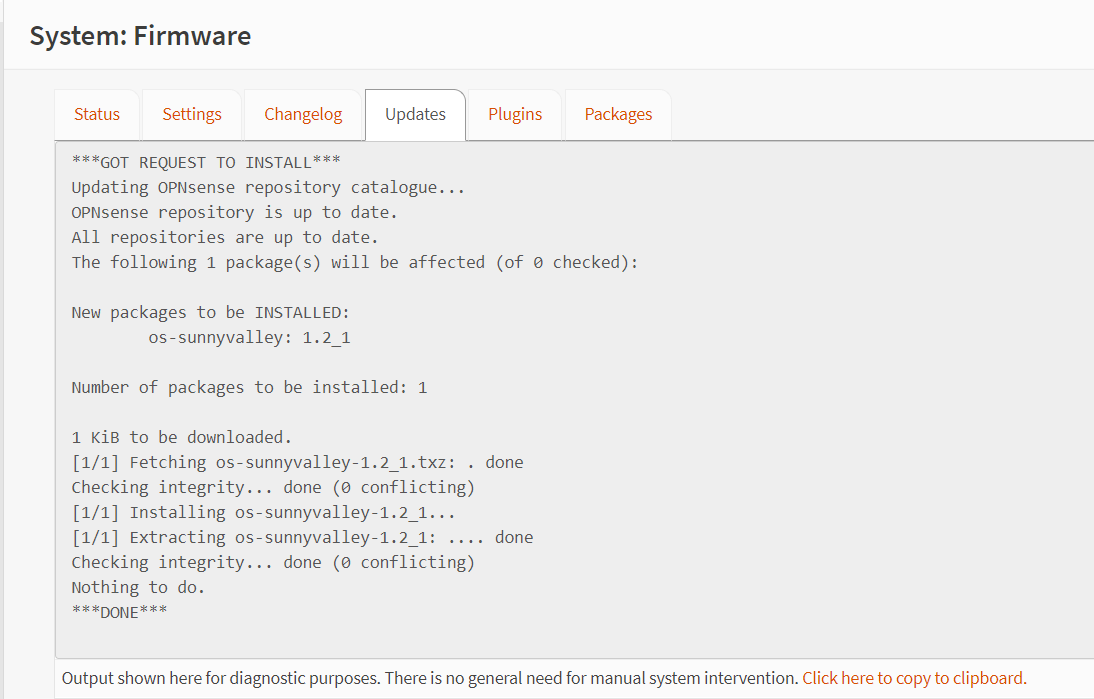
Figure 2:
os-sunnyvalleyVendor Repository for Zenarmor is installed -
Click on the
Pluginstab. You should see thatos-sunnyvalleyVendor Repository plugin is installed. If you cannot see the newly installed plugin, please refresh your web UI with the F5 button.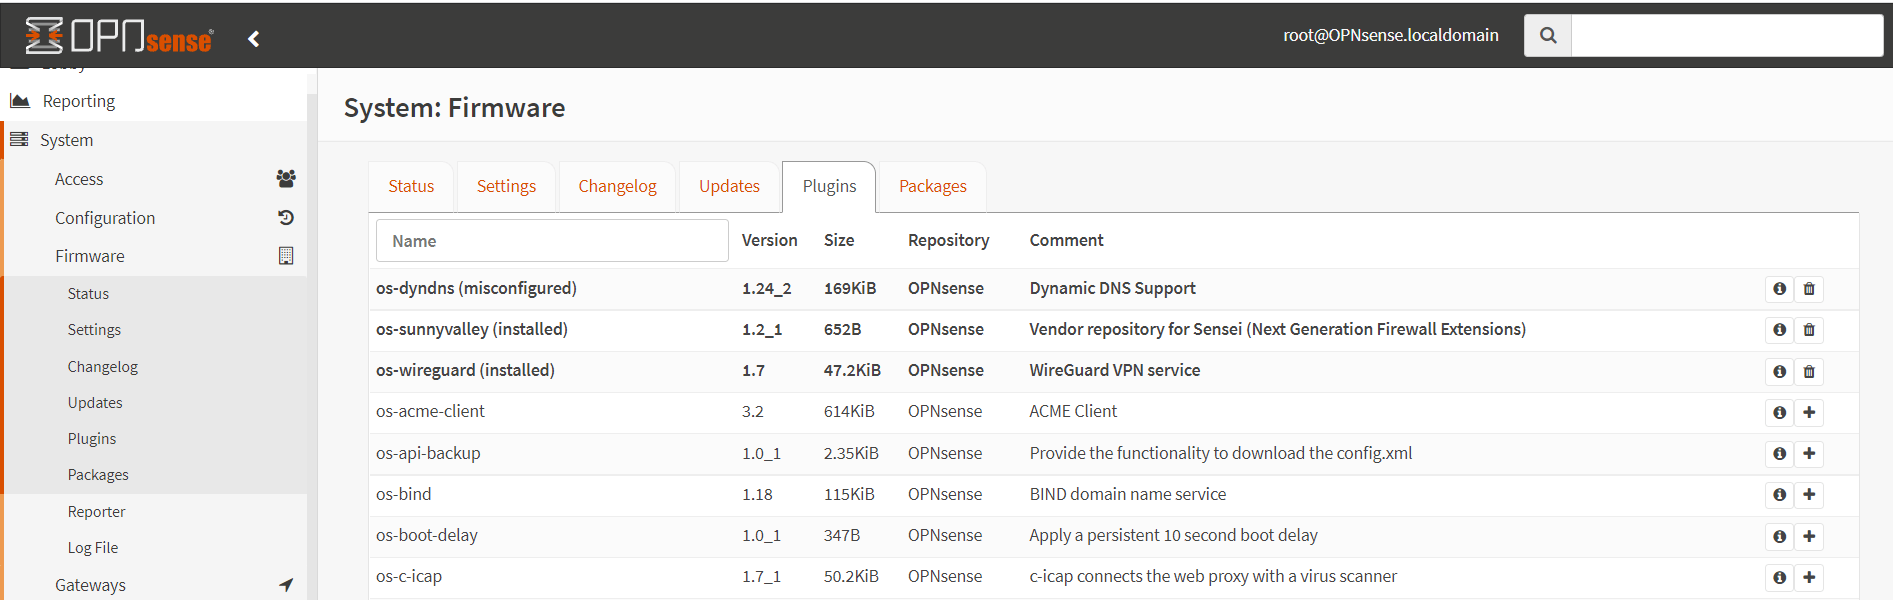
Figure 3: Installed and available OPNsense plugins
Zenarmor Next Generation Firewall plugin installation
To install the Zenarmor Next Generation Firewall plugin, follow the steps below:
-
Type
os-senseiin the search field on thePluginstab to find the Zenarmor Next Generation Firewall plugin for OPNsense.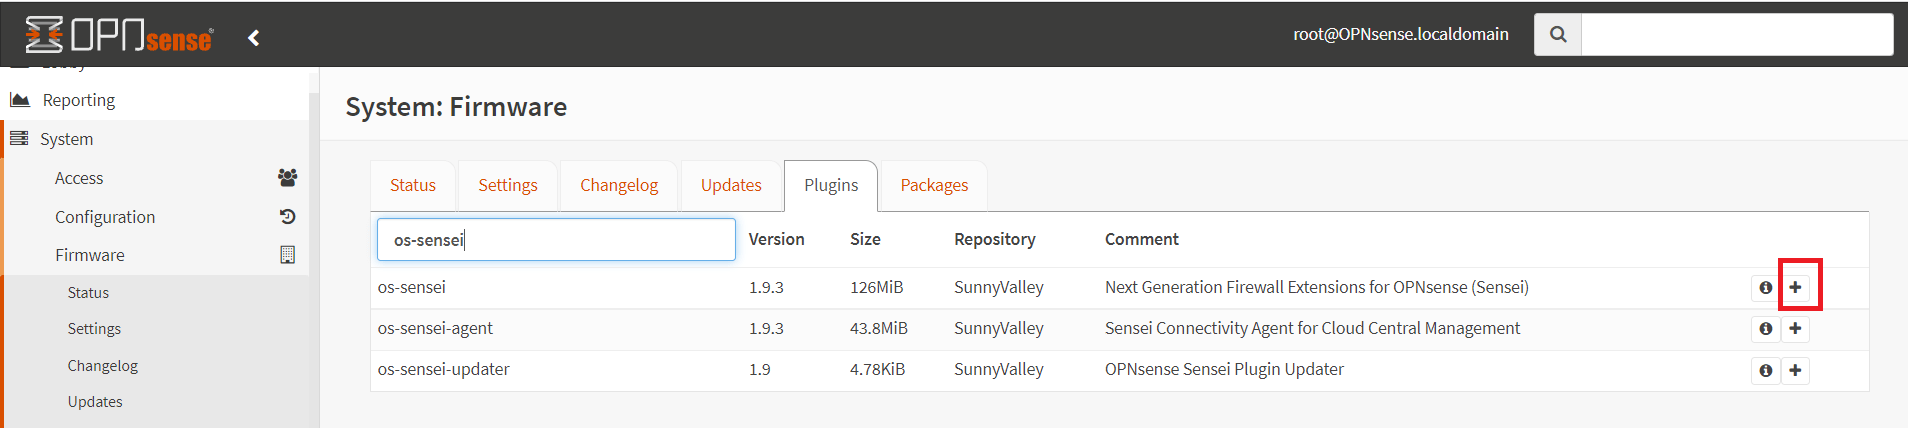
Figure 4: Installing Zenarmor Next Generation Firewall Extensions for OPNsense
-
Click the
+icon next toos-senseito install the plugin.
Figure 5: Third Party Software notification message
-
Click
Installto proceed to the plugin installation when Third Party Software notification message is displayed. -
After installing
Zenarmor, you should see theZenarmormenu in the left sidebar of the OPNsense web interface.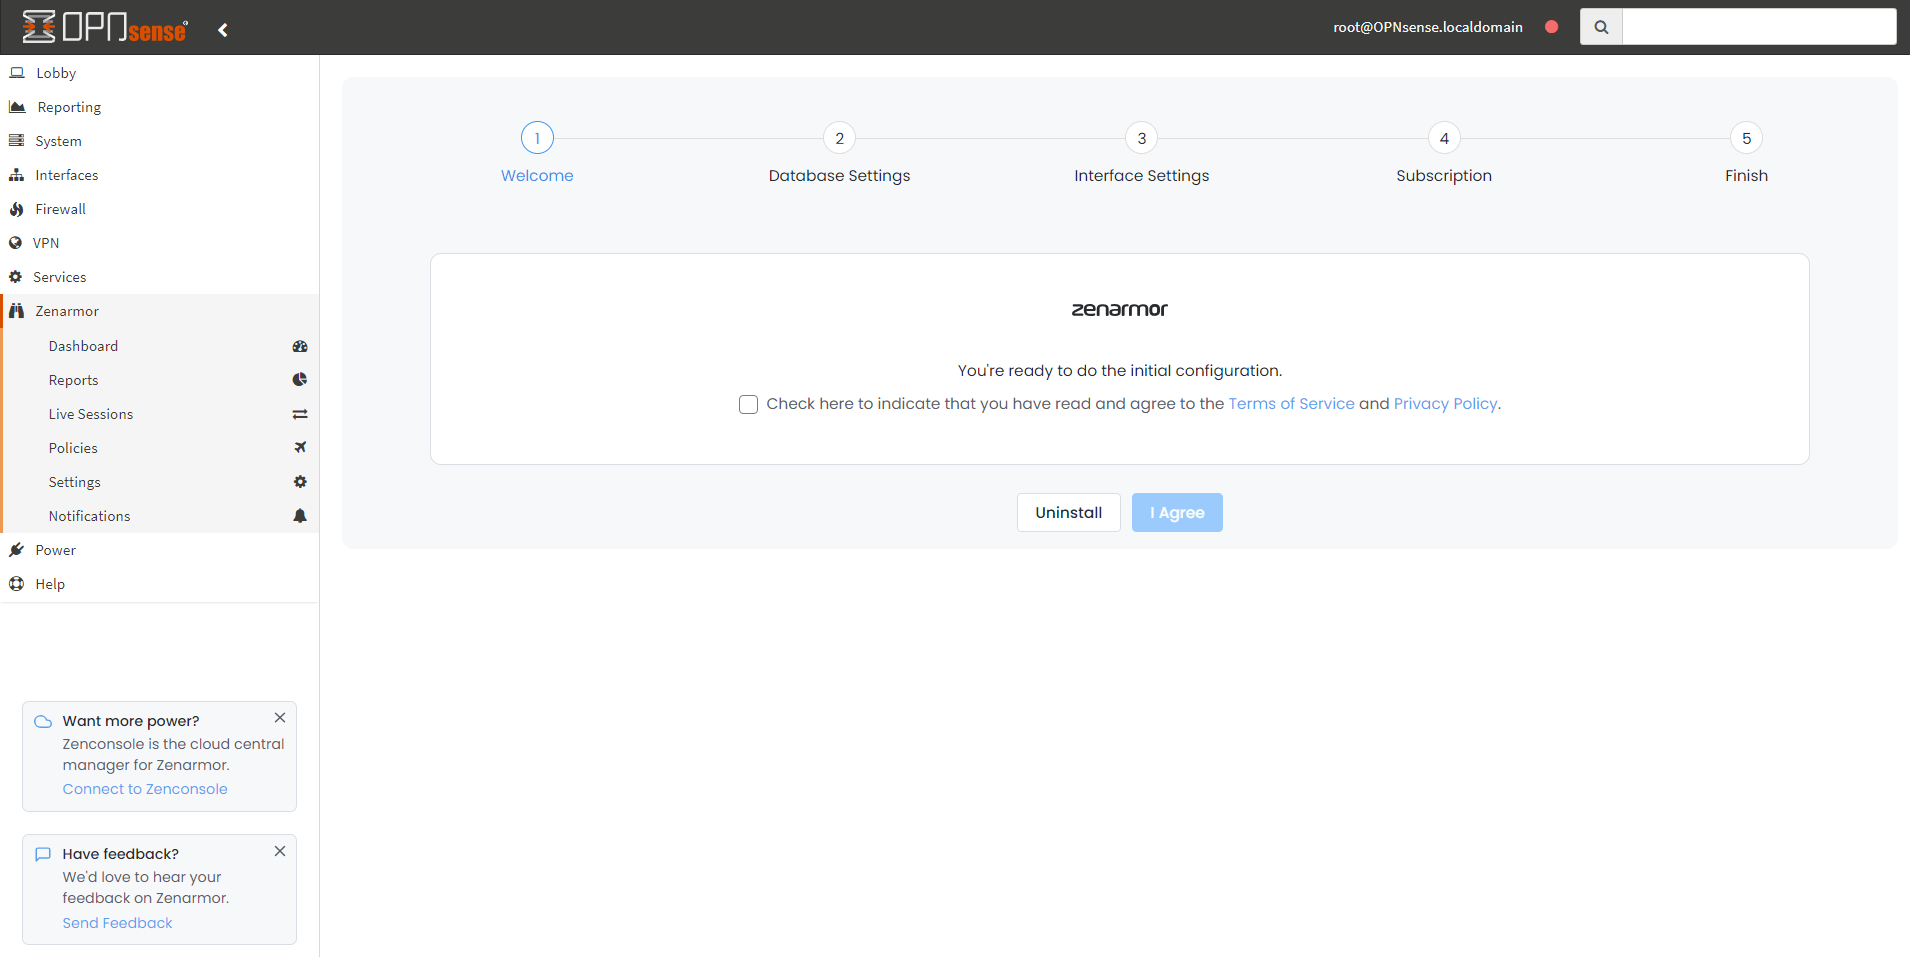
Figure 6: Initial Configuration Wizard for Zenarmor
-
You will need to complete the
Initial Configuration Wizardfor Zenarmor to be fully operational. For more information about the initial configuration of Zenarmor on OPNsense, please refer to the official documentation.
Although the preferred method of Zenarmor installation is the web interface, you can also install the plugin using the command line interface via SSH or direct system access. For more information, please refer to Installing Zenarmor on OPNsense via Command Line.
Here is a video that will guide you through the steps of the Zenarmor® installation and initial configuration process on OPNsense:
